

Chalkboards are everywhere! They are not only used in school, but in decor and design projects. In this tutorial, I'm going to teach you how to create a chalk-effect with just about any font.
A while ago, I was asked by Always Something Thrift Store to create a 'Secret Coupon' for them using a chalkboard effect. For this tutorial, I'm going to use some of the design elements from that project.
Note: Click on any image to view in larger size.
A while ago, I was asked by Always Something Thrift Store to create a 'Secret Coupon' for them using a chalkboard effect. For this tutorial, I'm going to use some of the design elements from that project.
Note: Click on any image to view in larger size.
Step 1

See Red Arrow 1: Select the Type Tool in the Tools Panel. See Red Arrow 2: Go to the top and select a font of your choosing. For this tutorial, I selected the font, Honey Script Semi Bold. See * Go to the Color Picker and select a color of your choosing. See Red Arrow 3: Make a copy of the layer with the text on it. With the copied layer selected, right click the layer and select Rasterize Layer. Rasterizing the layer will enable you to edit it.
Step 2
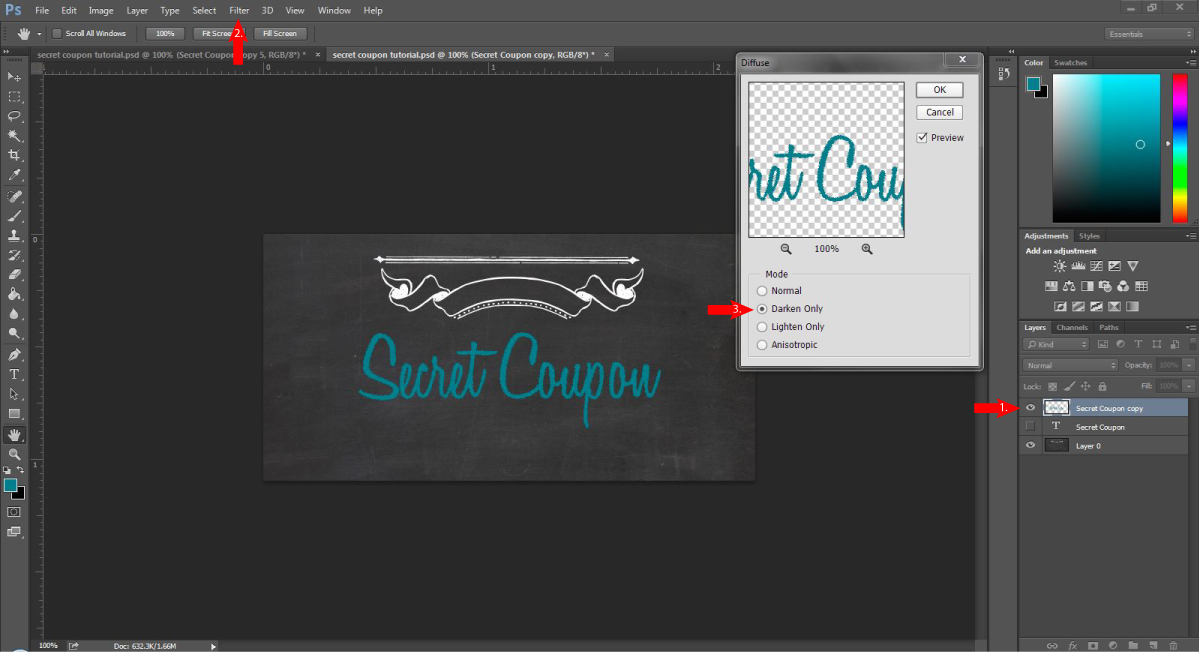
See Red Arrow 1: Make sure to keep the copied layer selected. See Red Arrow 2: At the top, go to Filter>Stylize>Diffuse.
See Red Arrow 3: A Dialogue Box will appear. Select Darken Only and hit OK.
See Red Arrow 3: A Dialogue Box will appear. Select Darken Only and hit OK.
Step 3: Optional Step
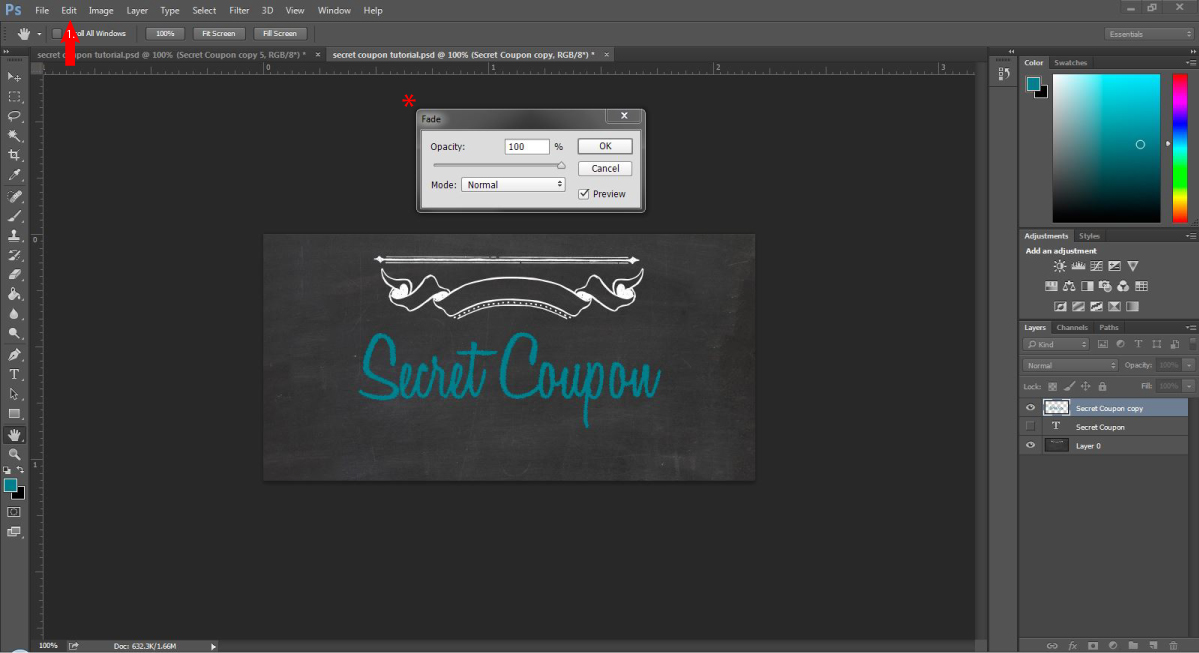
If you felt like the diffuse effect was a little too much, you can always tone it down by going to See Red Arrow 1: Edit>Fade.
* A Dialogue Box will appear and you can move the slider to any number you want.
* A Dialogue Box will appear and you can move the slider to any number you want.
Step 4
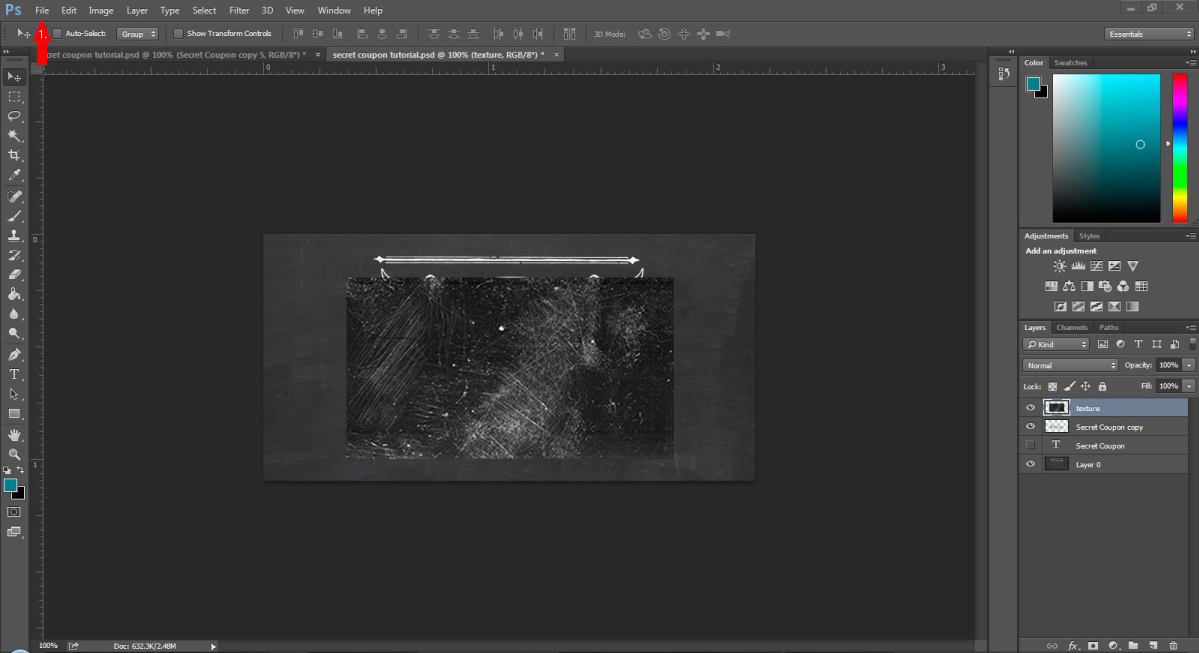
Now our font has some texture to it, but it doesn't look realistic enough. I'm going to add some more texture using a picture of dust and scratches, When you find a similar picture, See Red Arrow 1: Go to File>Place Embedded or File>Place depending on which version of CS you are using.
Step 5
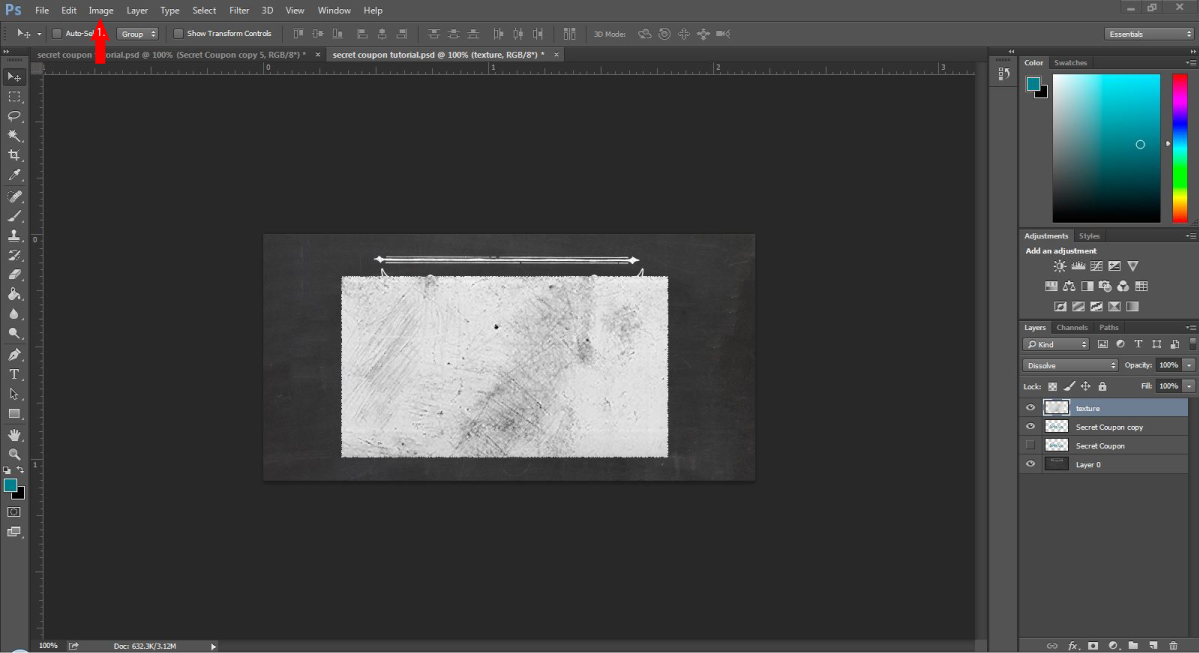
See Red Arrow 1: With the textured layer selected, go to Image>Adjustments>Invert. This will give the image a negative effect.
Step 6
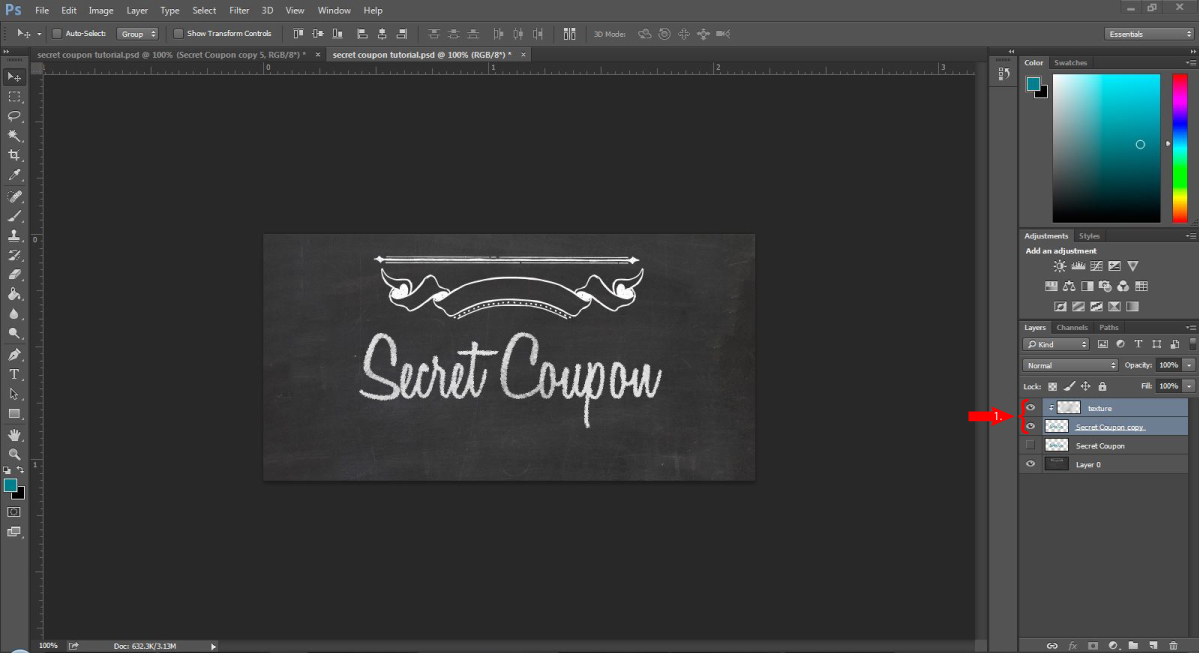
See Red Arrow 1: Hold the Shift Key down and select the textured layer and the secret coupon layer. With both layers selected, hold down the Alt Key and move your arrow to the center of the two layers. A black arrow and a white box symbol will appear. As you're holding the Alt Key down, select the two layers.
The texture has been instantly applied to the text! As you can see here, it has made the text white. It looks great, but we still want that blue color. Continue to the last step!
The texture has been instantly applied to the text! As you can see here, it has made the text white. It looks great, but we still want that blue color. Continue to the last step!
Step 7
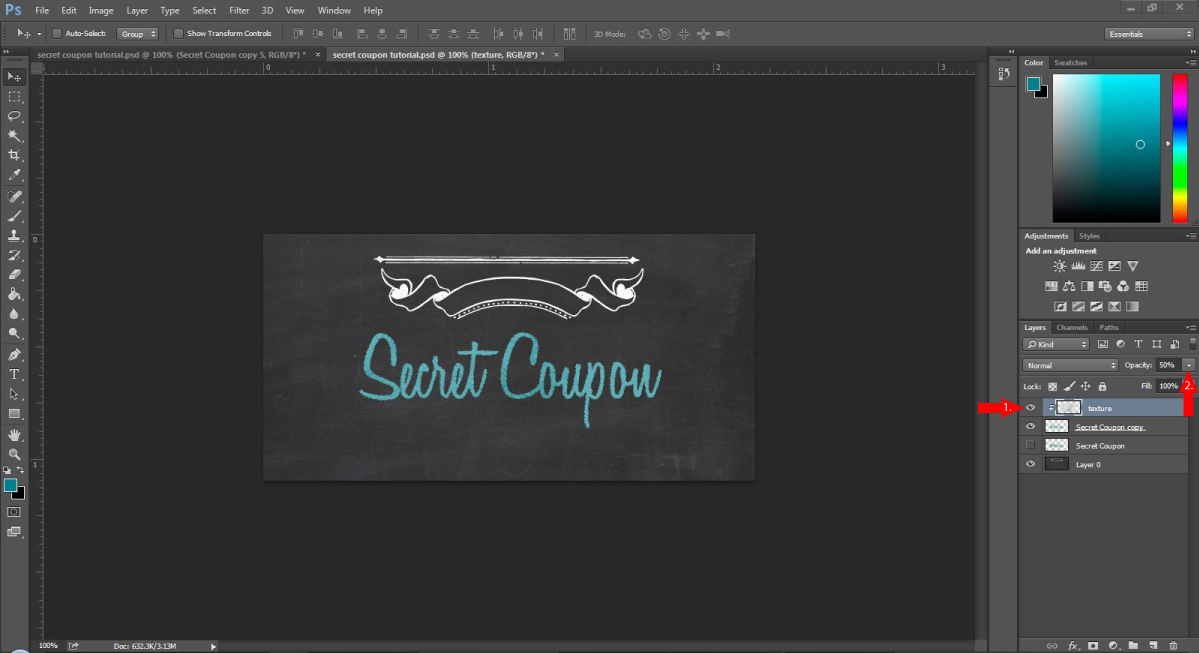
See Red Arrow 1: Only have the textured layer selected. See Red Arrow 2: Go to Opacity and move the slider down to 50%.
I would love to hear from you. If you have any questions, please leave them in the comments section below. Thank you.

 RSS Feed