Search my world!
Trina Eliza Designs
  • Home
  • About
  • Designs
  • Photography
  • Fine Art
  • Contact
  • Blog

New Facebook Page

6/5/2015

1 Comment

 
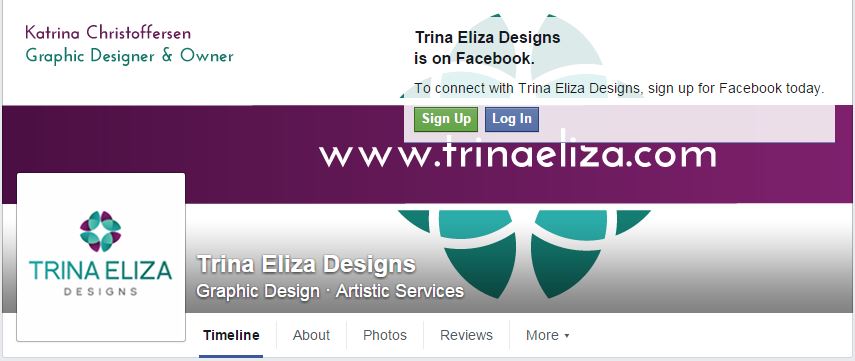
I just put together a FB Page for Trina Eliza Designs. Come join me on Facebook.
Picture
1 Comment

New Logo for Trina Eliza Designs

6/4/2015

0 Comments

 
Picture
New Logo
Picture
Old Logo
If you have been to my website before, you might have noticed some changes. I updated my logo and website with a whole new look, including different colors and typeface. I am retiring my blue face girl. She has served me well, but I'm taking my business to a whole new level. In the gallery below, I have included my brand identity: Online Ad, Car Magnet, & Business Card. I'm very excited about the new changes for Trina Eliza Designs!
0 Comments

Always Something Thrift Store Needs Your Help!

6/2/2015

0 Comments

 
Picture
Picture
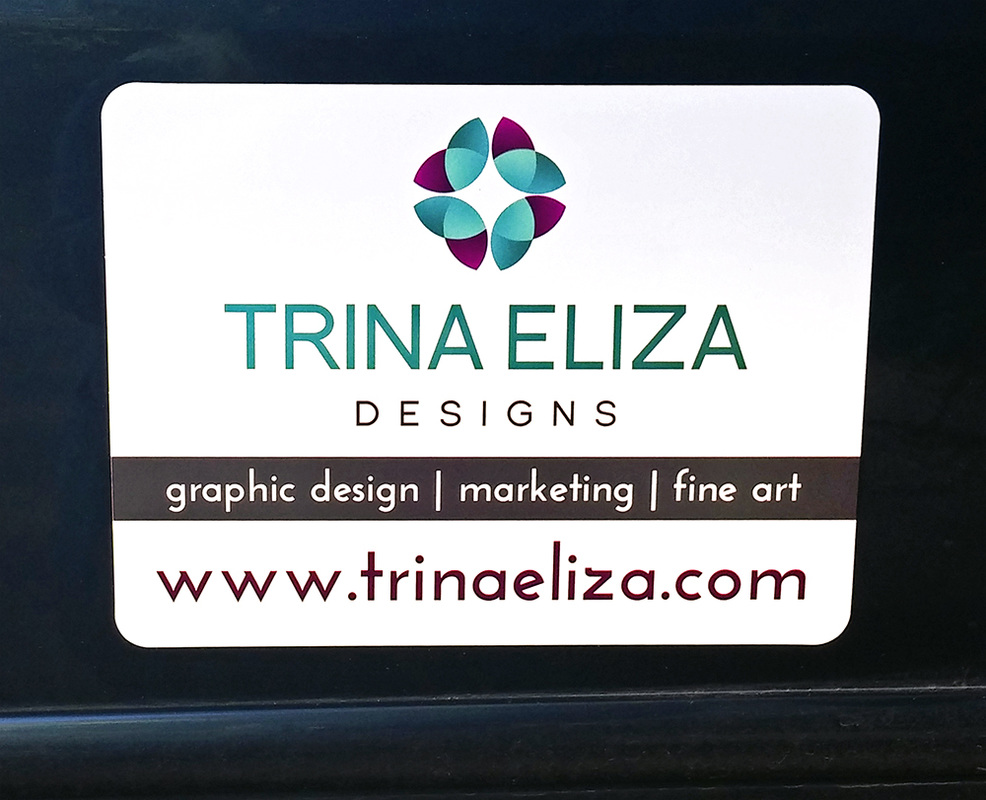
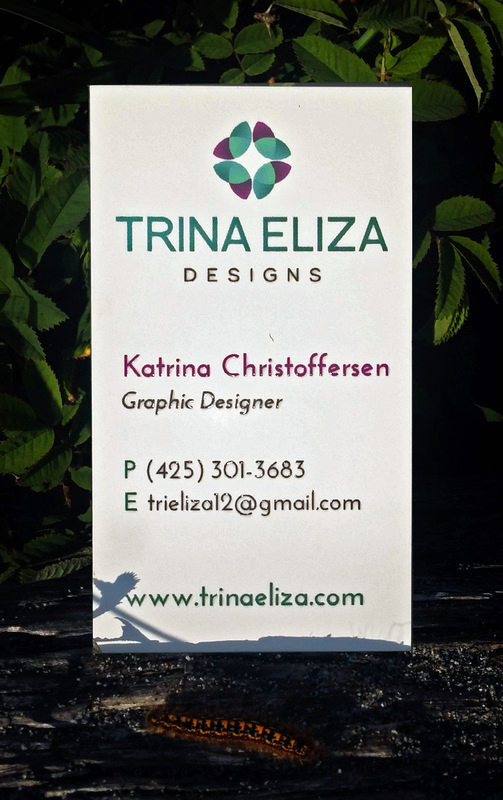
On Friday, May 29th, Always Something Thrift Store was robbed of over $4000! Since so much money was stolen, they can not afford the operation costs. 

Despite these unfortunate events, the thrift store will continue to push forward and help people, but they need your support to undo the damage. Please help Always Something get back on its feet! 
Whether you can give a dollar or ten or a hundred, anything would make a big difference! 

A GoFundMe page was setup. Any donation, no matter how big or small, is greatly appreciated!

A little about the thrift store: Always Something is a non-profit located in Everett, Washington and they depend on volunteers and donations to keep the store going. All proceeds go to benefit local charities: Salt of the Earth Food Bank, Kids Dream Clothing Drive & Kiera Cares (Both Sponsored by There's Always Something), Wanda Jankelson Foundation for Healthcare & Research & the Marsha Rivkin Center for Ovarian Cancer Research.
0 Comments

Big Changes for the New Year!

12/30/2014

1 Comment

 
Picture
Many changes have happened to Trina Eliza Designs. Since a new year will soon be approaching, I decided to give my website a little makeover.

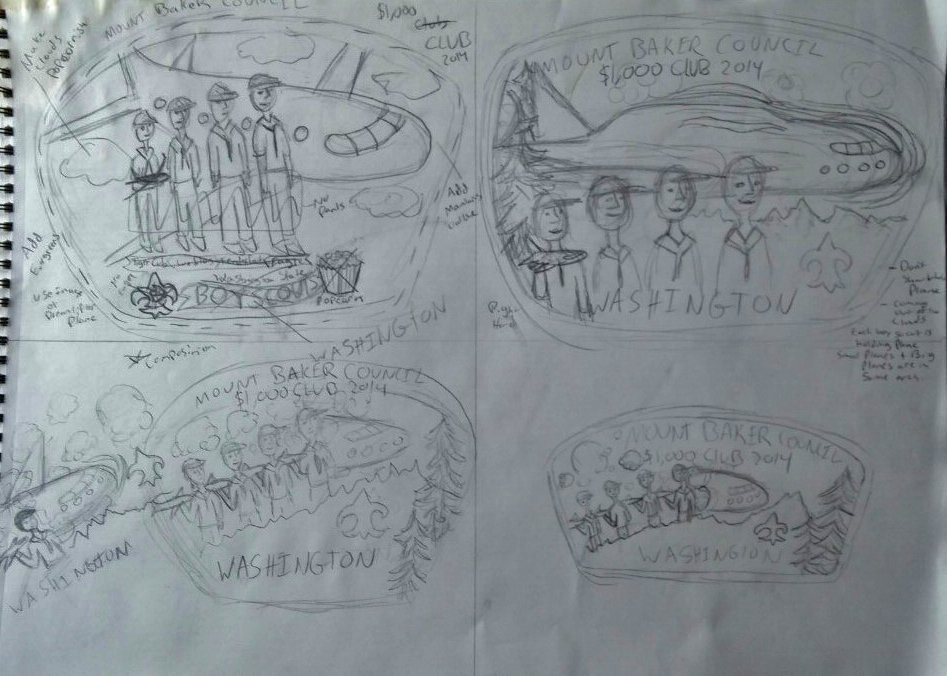
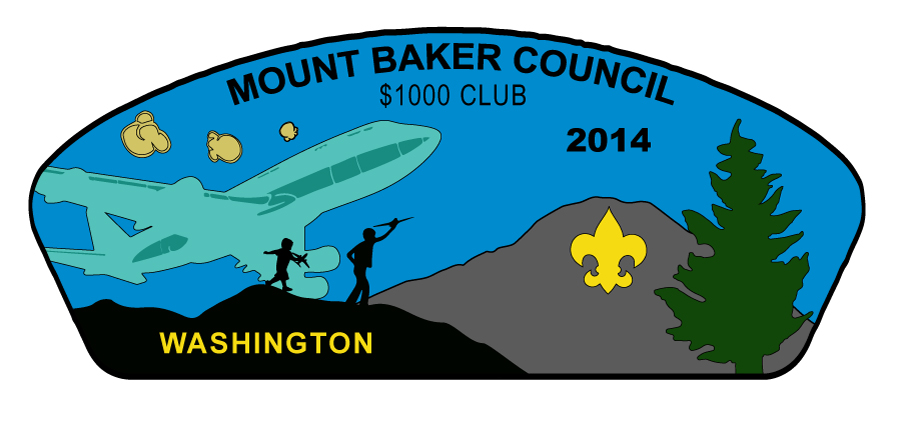
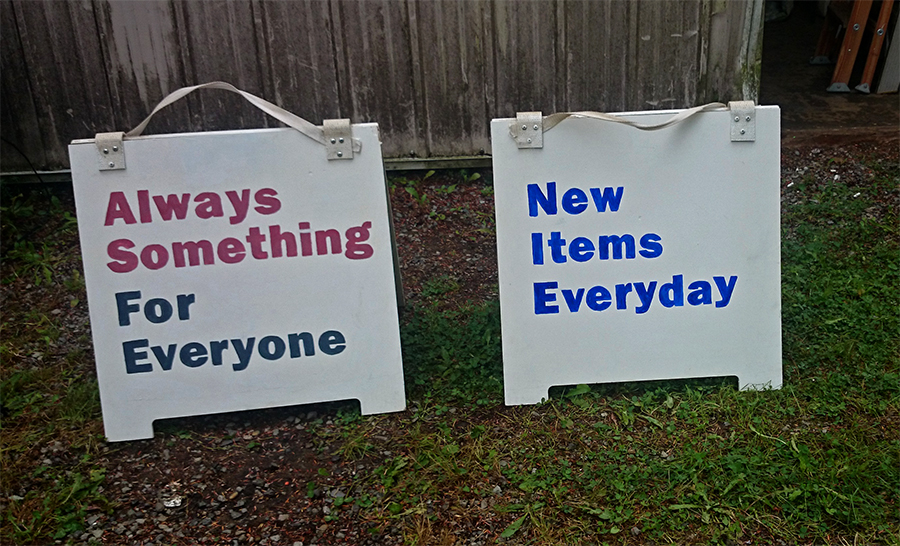
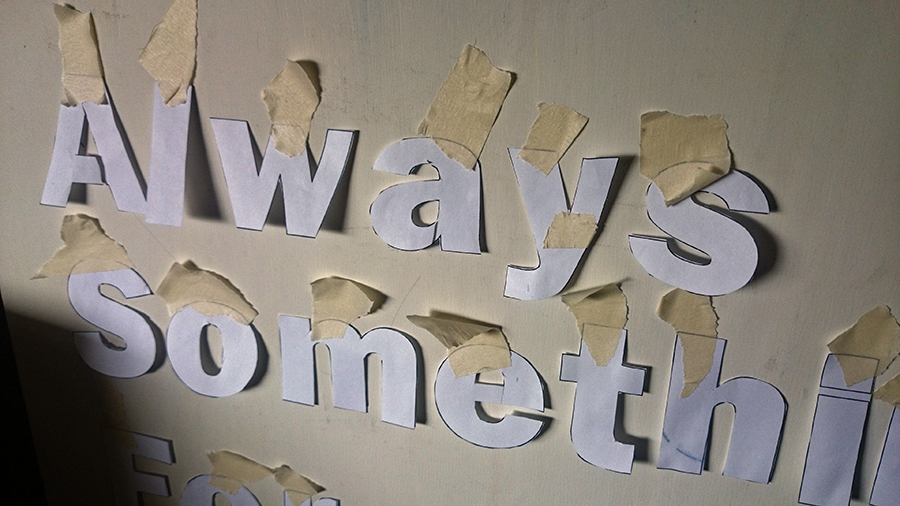
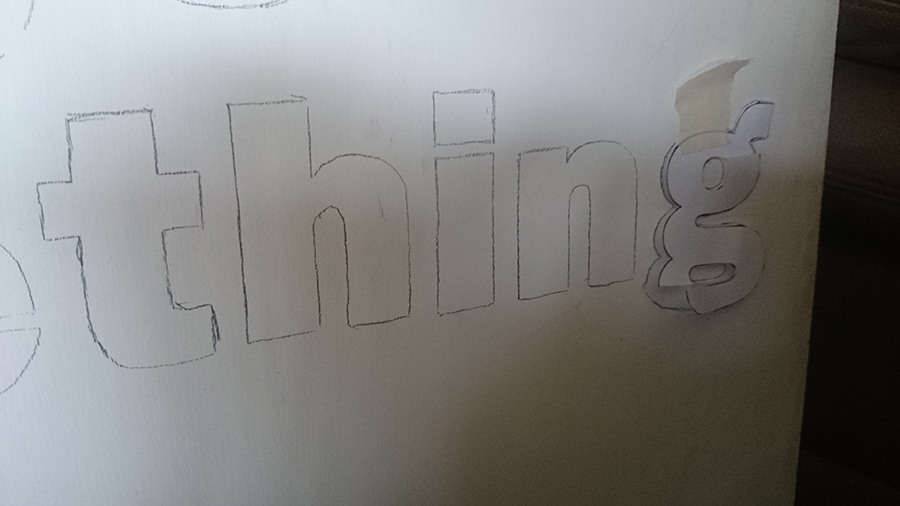
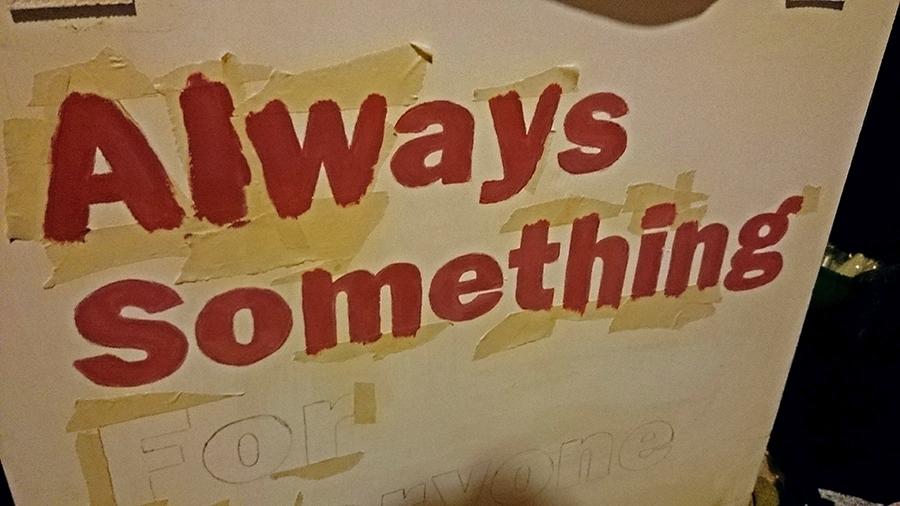
Recently, a brand new photography section has been added to Trina Eliza Designs. The photos were taken over a course of one year in Washington State and Las Vegas. Since I'm a recent transplant to Washington, I have very much enjoyed going on mini-road trips with my family and exploring this beautiful state with my camera. 

I hope you enjoy the photos!

Happy New Year!
1 Comment

New Badge for the Mount Baker Boy Scouts!

12/16/2014

0 Comments

 
The Mount Baker Boy Scout Council in Everett, Washington is a valuable organization that helps boys achieve personal growth through community service and fundraising.  One of their fundraisers is the Mount Baker Popcorn Sales. This new badge will be given to all Boy Scout Units who raise over $1,000 in popcorn sales.

"The goal of the popcorn sale is to raise funds needed to help Units fund their Scouting year and to support their local Scouting programs. The Popcorn sale can also be an extremely important financial resource for families." - Mount Baker Website

To learn more, please visit: http://mountbakerbsa.org/giving/popcorn/index.html

It was a very enjoyable experience creating the popcorn badge. This was my first time designing something that would later be embroidered on a patch. It was a challenging experience, but I learned a lot! Below are the steps I took to create the badge. As I explained in a previous blog post, all projects begin with many sketches!
Picture
0 Comments

New Logo for WROA

11/21/2014

0 Comments

 
I'm happy to announce that my logo design for the Washington Rental Owners Association has been accepted and is now featured on their website. Click here to visit WROA.
0 Comments

New Signs for Always Something Thrift Store

11/4/2014

0 Comments

 
I just completed some new signage for Always Something Thrift Store. This was a fun project to do because I got to hand paint the signs. Since we are a non-profit thrift store, we had a budget that did not include going to a professional printer. I had to think of a way of creating signage that used clear, but bold typography.  

With the use of a home printer, masking tape, a pencil, a pair of scissors, a paintbrush and paint, I discovered you can make professional looking signs without the cost of going to a printer. As for the signs, they were donated to us from a local real estate company. 

Below is a gallery of the finished signs and the process I used to paint them.
0 Comments

Graphic Design: The Bad and the Downright Ugly!

9/1/2014

0 Comments


Exploring why it's OK to be proud of your earlier Photoshop projects, 
no matter how bad they are!

My gallery of ugly!
A birthday card for my mom. This is just really bad! (from 2008)
An attempt at photo editing accidentally turned my mom into a wax sculpture. (from 2008)
Melting cats everywhere! I honestly don't know what I was thinking when I made this! (from 2008)
Last night, I took a trip down memory lane while organizing some files on my laptop. As I was going through each file, I came across a few Photoshop projects from 6 years ago and for a good laugh, I wanted to share them with you. 

If you asked me what I was thinking when I created these things, I couldn't tell you. At the time, I was just excited to get my first copy of Photoshop. For better or for worse, I experimented with all the filters and tools that Photoshop had to offer. I created birthday cards for my parents by stitching together random photos and applying filters. Even though they were disastrously bad, I didn't care. To me, it was all about having fun and learning my new software.

As I was going through each project, I became very humbled.  I've come a long way as a graphic designer. As Ralph Waldo Emerson once stated, "Every artist was first an amateur."

If you are new to graphic design, then don't get discourage if you mess up or even create a Photoshop monstrosity like I did. In design school, you are expected to make mistakes and learn from them. I sometimes look back at my old school projects and question why I made that font or layout choice. I learned from those mistakes and moved on to create better work. It takes time to perfect your craft. This involves countless hours of practice and keeping up-to-date on the latest design techniques, trends, and most importantly, knowledge. Even when you are done with school, never stop learning. Read design books, blogs, magazines, or watch video tutorials on YouTube.  You will create better work 
that way.

So don't be ashamed of your earlier projects. See it as a testament to how far you have come as a designer.
0 Comments

Tutorial: Create Stunning Chalkboard Effects!

7/6/2014

4 Comments

 
Picture
Chalkboards are everywhere! They are not only used in school, but in decor and design projects. In this tutorial, I'm going to teach you how to create a chalk-effect with just about any font.

A while ago, I was asked by Always Something Thrift Store to create a 'Secret Coupon' for them using a chalkboard effect. For this tutorial, I'm going to use some of the design elements from that project. 


Note: Click on any image to view in larger size.

Step 1

Picture
See Red Arrow 1: Select the Type Tool in the Tools Panel. See Red Arrow 2: Go to the top and select a font of your choosing. For this tutorial, I selected the font, Honey Script Semi Bold. See * Go to the Color Picker and select a color of your choosing. See Red Arrow 3: Make a copy of the layer with the text on it.  With the copied layer selected, right click the layer and select Rasterize Layer. Rasterizing the layer will enable you to edit it.

Step 2

Picture
See Red Arrow 1: Make sure to keep the copied layer selected. See Red Arrow 2: At the top, go to Filter>Stylize>Diffuse. 
See Red Arrow 3: A Dialogue Box will appear. Select Darken Only and hit OK.

Step 3: Optional Step

Picture
If you felt like the diffuse effect was a little too much, you can always tone it down by going to See Red Arrow 1: Edit>Fade.
* A Dialogue Box will appear and you  can move the slider to any number you want.

Step 4

Picture
Now our font has some texture to it, but it doesn't look realistic enough. I'm going to add some more texture using a picture of dust and scratches, When you find a similar picture, See Red Arrow 1: Go to File>Place Embedded or File>Place depending on which version of CS you are using.

Step 5

Picture
See Red Arrow 1: With the textured layer selected, go to Image>Adjustments>Invert. This will give the image a negative effect. 

Step 6

Picture
See Red Arrow 1: Hold the Shift Key down and select the textured layer and the secret coupon layer. With both layers selected, hold down the Alt Key and move your arrow to the center of the two layers. A black arrow and a white box symbol will appear. As you're holding the Alt Key down, select the two layers. 

The texture has been instantly applied to the text! As you can see here, it has made the text white. It looks great, but we still want that blue color. Continue to the last step!

Step 7

Picture
See Red Arrow 1: Only have the textured layer selected. See Red Arrow 2: Go to Opacity and move the slider down to 50%. 

Picture
I would love to hear from you. If you have any questions, please leave them in the comments section below. Thank you.
4 Comments

Busy, Busy

6/6/2014

0 Comments

 
It has been awhile since I've been blogging. Many changes have happened in the past couple of months: moving from Nevada to Washington and finally landing a job! In addition, I've been keeping busy with freelance gigs.

Now that everything is starting to settle down, I will continue blogging about graphic design.
More design tips and news will be coming, so stay tuned! 
0 Comments
<<Previous
Forward>>

    Author

    Katrina Christoffersen 
    Graphic Designer

    Picture

    Archives

    December 2015
    November 2015
    October 2015
    September 2015
    August 2015
    June 2015
    December 2014
    November 2014
    September 2014
    July 2014
    June 2014
    November 2013
    October 2013
    September 2013

    Categories

    All
    Always Something Thrift Store
    Chalkboard Tutorial
    Fonts
    Fonts For Personal And Commercial Use
    Free-Arts Education Workshop Program
    Lil' Art Bodega
    Mount Baker Boy Scouts
    Photography
    Photoshop Tutorial
    Relax. Relate. Create
    Thrift Store Logo
    Trina Eliza Designs Logo
    Type:Rider
    Typography
    Washington Rental Owners Association

    RSS Feed

2012-2023 TrinaEliza.com