
In this tutorial, I'm going to show you how to fix a badly damaged photo. The photo below was found on the internet and for good practice, I restored it myself. When people saw the before and after images, they asked me how I restored the right eye of the little girl. This prompted me to make a tutorial focusing only on restoring the damaged eye of the little girl. In this tutorial, I placed red arrows on each image below and I will refer to them as we go along.
Note: Click on each image below to view larger size.
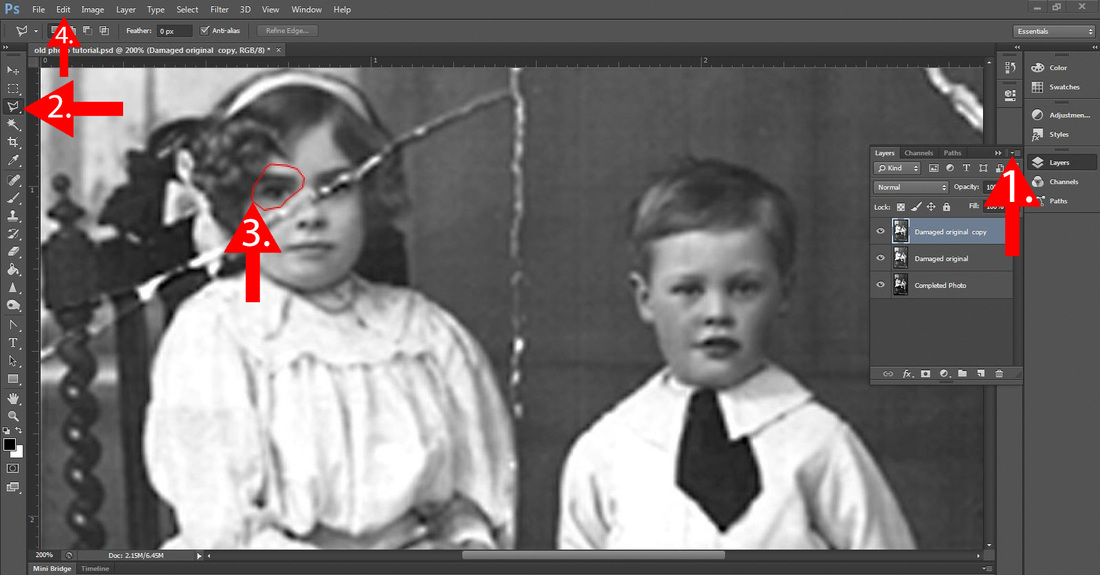
Step 1. Find an old photo you would like to restore and open it in photoshop. With the photo open, go to the Layers Panel and click on the Drop-Down Menu (see #1 red arrow) and click Duplicate Layer. There should now be an exact duplicate of that layer. With the duplicate layer selected, go to the Tools Panel and click on the Polygonal Lasso Tool (see #2 red arrow). With that tool selected, go to the left eye and make a selection (see #3 red arrow). If you make a mistake, hit Ctrl-D to deselect. When you are done, double click your selection. There should be a dotted line around the eye. For this tutorial, I used a red circle to hi-light the selection. While the eye is selected, go to Edit>Copy and Edit>Paste or you can hit Ctrl-C and Ctrl-V on your keyboard.
Note: You don't have to use the Polygonal Lasso Tool to make a selection. It's just a personal preference of mine. You can also use the Lasso Tool, the Magnetic Lasso Tool or even the Pen Tool to make a selection.
Note: You don't have to use the Polygonal Lasso Tool to make a selection. It's just a personal preference of mine. You can also use the Lasso Tool, the Magnetic Lasso Tool or even the Pen Tool to make a selection.
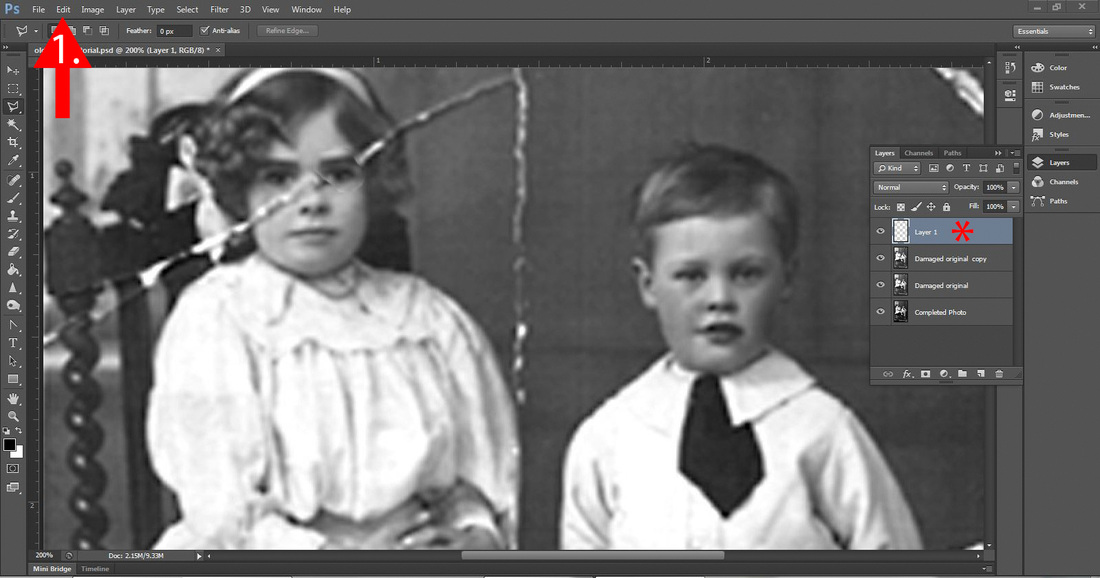
Step 2. (See *) You should notice a new layer in the Layers Panel with just a copy of the eye. You don't want to have the eye look completely symmetrical. To make it look more natural, you will need to rotate the eye a little. (See #1 arrow) go to Edit>Transform>Rotate or hit Ctrl-T on your keyboard. When you are done, proceed to Step 3.
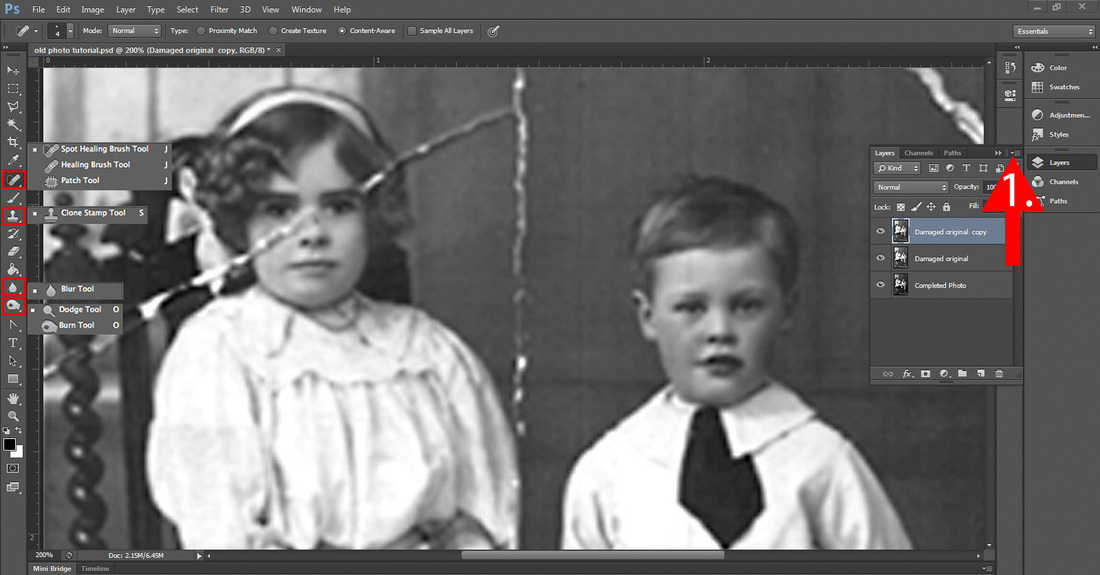
Step 3. Go to the Layers Panel. While holding down the Shift key, select the duplicate layer and the layer with the copy of the eye. Then click on the Drop-Down Menu (see #1 red arrow) and click Merge Layers or Ctrl-E. With the two layers merged into one, you can now start to blend the right eye in with the rest of the face. In the Tools Panel (far left), I hi-lighted several tools that I use for blending and getting rid of damage.
Spot Healing Brush Tool: Brush over a damaged area with this tool and the damage instantly disappears.
Healing Brush Tool: Hold down the Alt key (a target symbol will appear) and click on an an undamaged area of the image. After you have selected an undamaged area, go to a damaged area on the image and brush over it. This is a little similar to the Clone Stamp Tool, except that the Healing Brush Tool blends in the pixels.
Patch Tool: This tool is pretty fun to use. With this tool, you make a selection by drawing a line around the damaged area. When you are done making a selection, a dotted line will appear. Next, click and drag the selected area to an undamaged area. The damaged area is instantly fixed!
Blur Tool: This tool is helpful when I want to smooth out part of an image.
Dodge Tool: I use this tool to add highlights to a face or object or to lighten up an area on the image.
Burn Tool: I use this tool to create shadows on a face or object or to darken an area of the image.
Note: As you can see, there are many ways to remove damage on an image. If you find that one tool isn't doing the job, then try another tool. This is all about trial and error: seeing what works and what doesn't!
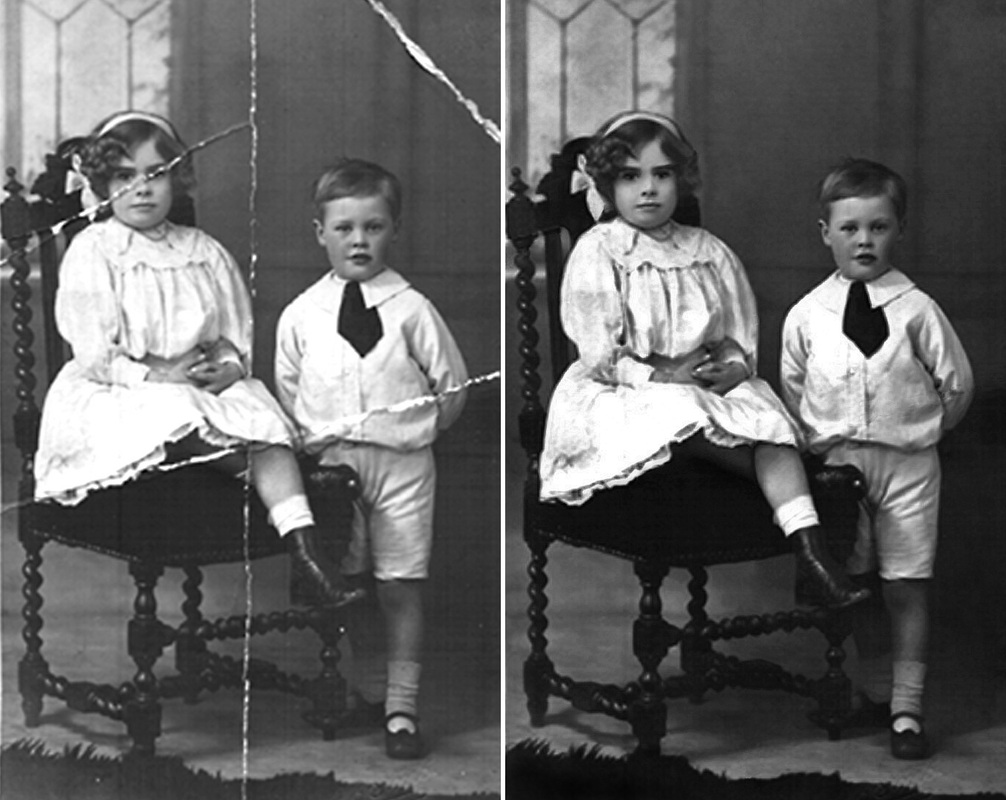
Here are the before and after images:
Please note that even though I only focused on the eye, you can also fix the other damaged parts of a photo using the tools I mentioned in step 3.
Please note that even though I only focused on the eye, you can also fix the other damaged parts of a photo using the tools I mentioned in step 3.

 RSS Feed