
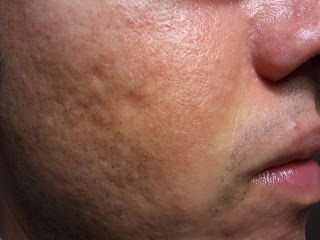
For this photoshop tutorial, I'm going to show you how to use a layer mask to smooth rough and blemished skin. This is a very useful photoshop technique that I have used many times to retouch images. In this tutorial, I placed red arrows on each image below and I will refer to them as we go along.
Note: Click on each image below to view larger size.

Step 1. For this tutorial, find an image you want to retouch and open it in photoshop. In photoshop, go to File>Open and then look for your image to open up. Once you have the image opened, go to the Layers Panel on the far right and click on the Drop Down Menu (see red arrow). In the Drop Down Menu, click on Duplicate Layer. You should now have a duplicate of the image.
Note: It's always a good idea to duplicate the original image, so you can refer to it as you go along. Also, if you made any mistakes that you absolutely can't fix, then you will always have the original image to fall back on.

Step 2. In the Tools Panel (far left) click on the Spot Healing Brush Tool (see red arrow). You can adjust the size of the Spot Healing Brush Tool by hitting the Square Bracket keys []. [ is for decreasing the brush size and ] is for increasing the brush size. When you have the size you want, move the Spot Healing Brush Tool over the blemish and click on it. The blemish should disappear. Keep doing this until all the blemishes are gone.
Note: For this tutorial, I removed much of the major blemishes, but not all of them. The main focus is the use of the Layer Mask to smooth the skin. If you would like to spend more time removing all the blemishes with the Spot Healing Brush Tool, then please take your time. When you are done, proceed to Step 3.
Note: For this tutorial, I removed much of the major blemishes, but not all of them. The main focus is the use of the Layer Mask to smooth the skin. If you would like to spend more time removing all the blemishes with the Spot Healing Brush Tool, then please take your time. When you are done, proceed to Step 3.
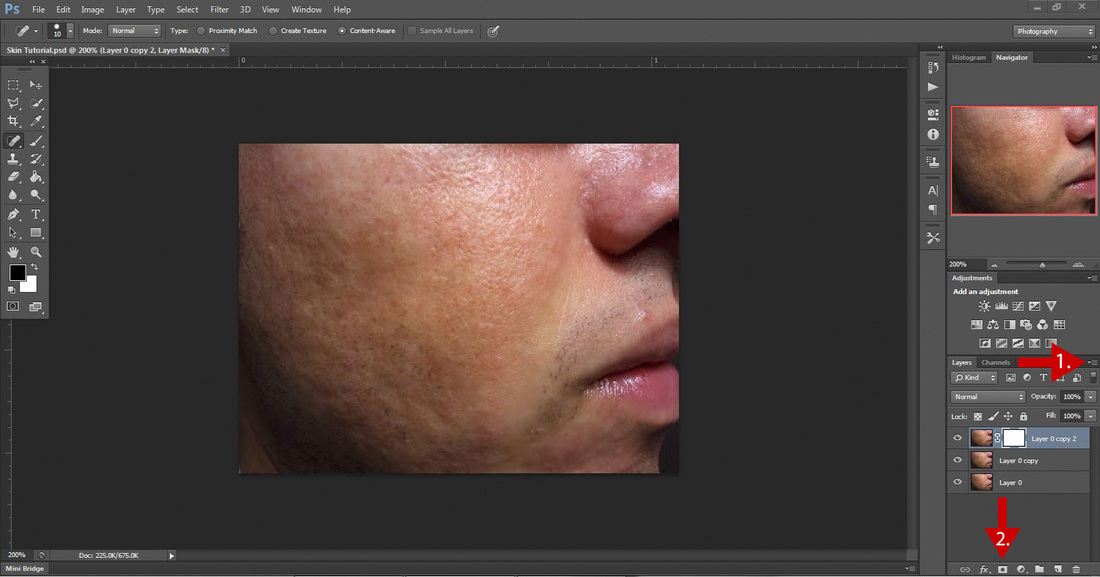
Step 3. Go back to the Layers Panel (far right) and click on the Drop Down Menu. (see #1. red arrow). Click Duplicate Layer. Make sure you are only duplicating the layer you edited and not the layer with the original image. Once you duplicated the layer, go to the bottom of the Layers Panel and click on the Add a mask button (see # 2. red arrow). A white box should appear next to the layer thumbnail.
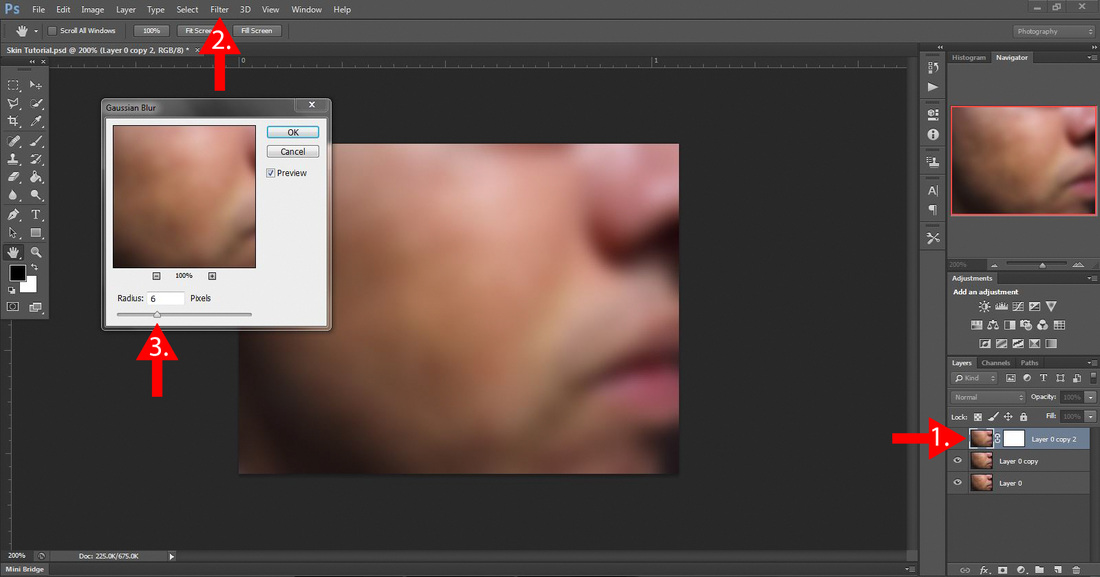
Step 4. (see #1 red arrow) Select the image thumbnail in the Layers Panel. A white bounding box will indicate that image thumbnail is selected. Go to the Menu Bar (see #2 red arrow) and click on Filter>Blur>Gaussian Blur. A dialog box will appear (see #3 red arrow). Move the slider to 6 Pixels and click OK. Your image will be completely blurred.
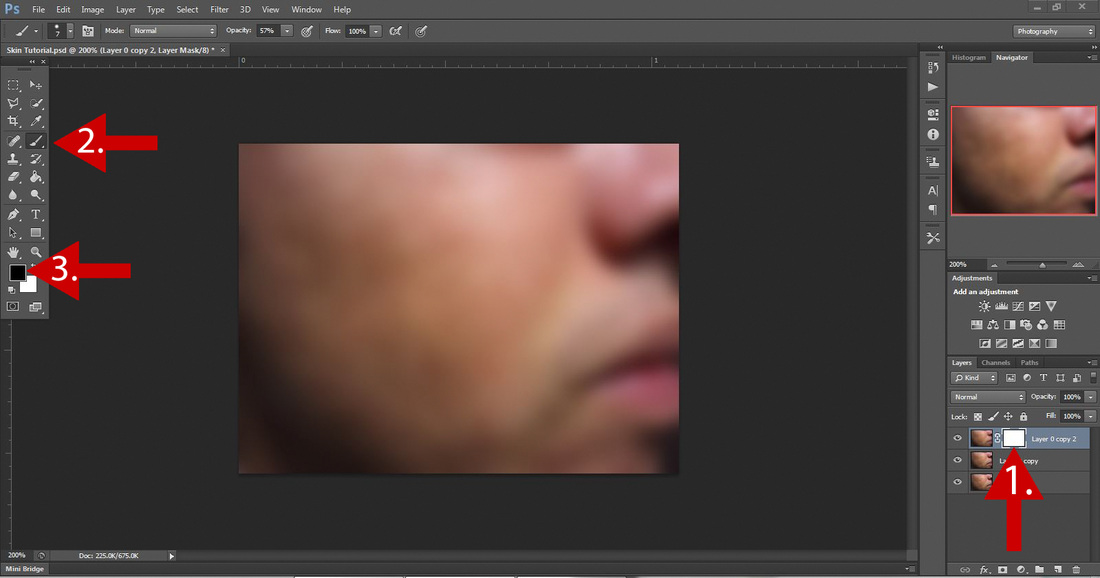
Step 5. (see #1 red arrow). Go back to the Layers Panel and click on the white box. A white bounding box will indicate that the white box is selected. In the Tools Panel (see # 2 red arrow), click on the Brush Tool or you can hit B on your keyboard and the tool will be selected. In the Tools Panel, go to the Color Boxes (see #3 red arrow). The Foreground Box should be set to black and the Background Box should be set to white.

Step 6. In the Layers Panel (see red arrow), make sure you have the white box selected. Now with the Brush Tool, paint underneath the nose and the lips. The areas you paint over will become unblurred and you should see the details of the nose and the lips (see *). If you make a mistake, don't worry. Go to the Color Boxes in the Tools Panel and click on the curved arrows to toggle between black and white. See image below. You can also hit X on your keyboard to toggle between black and white. With white selected, you can paint over the the lips and parts of the nose to blur it.

Note: The image I used only shows the lips and the nose. If you are using an image that shows the whole face, then you will also need to paint over the eyes, eyebrows, ears, hair and the entire background to deblur it. The only thing that should be kept blurred is the skin (cheeks, forehead, chin, neck, etc.)
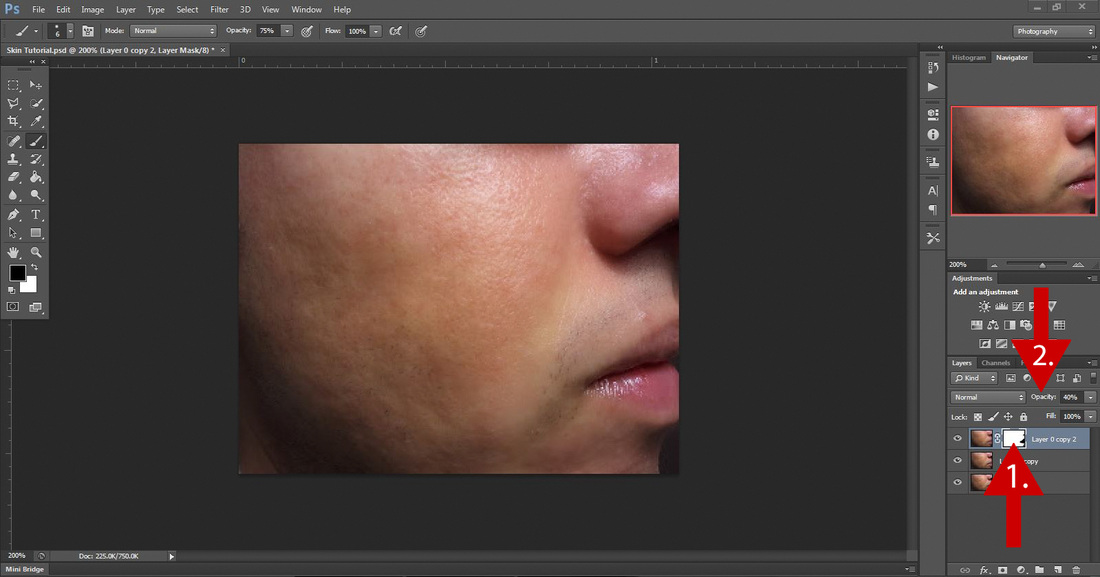
Step 7. (see #1 red arrow). In the Layers Panel, you will notice that the white box has some black in it. This shows the areas that were masked and not masked. With the white box selected, go to Opacity (see #2 red arrow) and lower it to 40% or however you see fit.
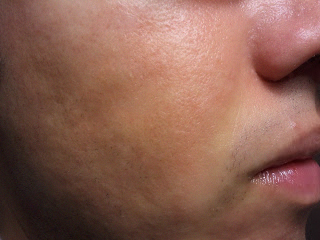
Note: For photo retouching projects like this, I like to keep the opacity below 50%. It keeps the image from looking fake or plastic. The goal here is to make the skin look smooth, but in a realistic way. Any image where the skin has absolutely no texture or pores looks fake to me. The only time I can think of where I would want to make the skin look unusually perfect are for projects with a fantasy or sci-fi theme. If you are working on a project with a theme like that, then it is appropriate to have the opacity above 50%.
Note: For photo retouching projects like this, I like to keep the opacity below 50%. It keeps the image from looking fake or plastic. The goal here is to make the skin look smooth, but in a realistic way. Any image where the skin has absolutely no texture or pores looks fake to me. The only time I can think of where I would want to make the skin look unusually perfect are for projects with a fantasy or sci-fi theme. If you are working on a project with a theme like that, then it is appropriate to have the opacity above 50%.
Here are the before and after images:
 |  |
 RSS Feed